

From Idea to Real Project: Use the ThingsInNet IoT Dev Kits

Building embedded systems, robotics projects, or Internet of Things (IoT) solutions with traditional prototyping boards can get messy very quickly. Wires end up everywhere, breadboards become confusing, and sensors can come loose or disconnect at the worst time. When you connect real devices, relay modules may even hang without proper support. In the end, the setup becomes hard to troubleshoot, unstable, and not reliable for long-term use.
The ThingsInNet Sensing and Actuating Dev Kits were created to solve exactly these challenges. These boards provide a clean, robust, and production-ready platform that allows you to:
- Collect real-world data such as temperature, humidity, ambient light, and motion etc..
- Connect any other compatible sensor modules
- Control real-world devices like lights, pumps, fans, and motors
- Connect everything to the Internet using the ESP32
All of this is available on a compact set of boards that are suitable even for real production use.
Two Boards, One Goal: A Complete IoT Ecosystem
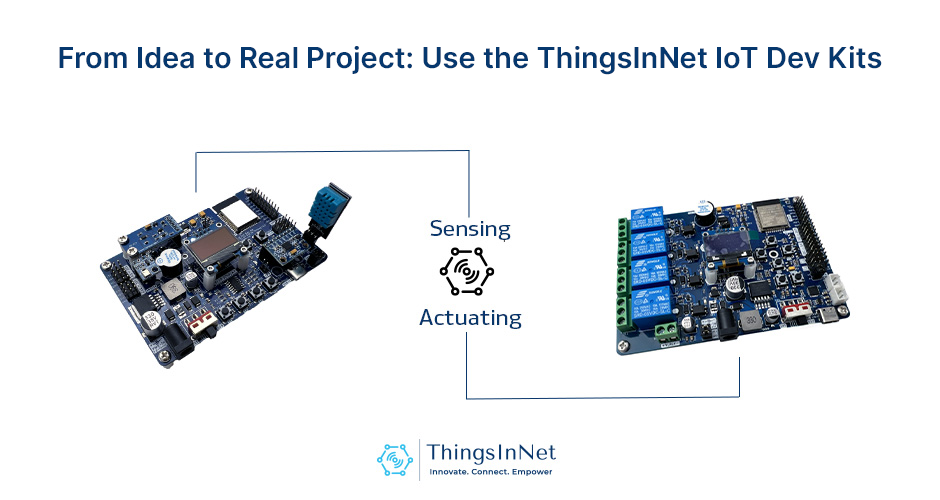
The system consists of two main boards:
- ThingsInNet ESP32 Universal IoT Dev Kit – Sensing (top)
- ThingsInNet ESP32 Universal IoT Dev Kit – Actuating (bottom)
You can use each board on its own or combine both in the same project for a full sensing-and-control IoT solution.
1. ThingsInNet Sensing Dev Kit – Your Plug-and-Play Sensor Lab
The Sensing Dev Kit is built around an ESP32, with popular sensors already mounted on the board. No extra wiring, no extra modules, just plug in USB, program it as you want using any ESP32 compatible platform and start reading data.
Typical onboard features include:
- Temperature & humidity sensor – for monitoring rooms, greenhouses, server racks, etc.
- Light sensor – for smart lighting and plant growth experiments.
- Pressure / altitude sensor – for weather and environment projects.
- Motion/orientation sensor – for detecting tilt, vibration or movement.
- Onboard OLED display – to show readings without a PC.
- Push buttons & buzzer – perfect for menus, alerts and quick testing.
- Expansion headers (I²C, GPIO) – to plug in your own extra sensors and modules.
- Plenty of power supply options – to power your external sensors and modules.
With all components neatly integrated, users can focus on programming and experimentation instead of troubleshooting wiring issues.
What can you build with the Sensing Dev Kit?
 Smart farming / hydroponic monitor – log temperature, humidity and light, and send data to the cloud.
 Room or office environment monitor – see how comfortable your space is over time.
 Lab data logger – capture and log data related to experiment.
 IoT dashboard project – push data to Firebase, ThingSpeak, MQTT brokers, Node-RED or ThingsBoard and many more.
If you are a teacher, a student or a builder, this board is an excellent “all-in-one lab” for IoT and sensor programming.
2. ThingsInNet Actuating Dev Kit – Turn Ideas into Real-World Action
Reading data is only a half of IoT projects. At some point, you’ll want to switch something ON or OFF, in other words control devices.
The Actuating Dev Kit integrates an ESP32 with four opto-isolated relays and industrial-grade screw terminals, enabling safe and reliable switching of external loads.
Key features:
- 4×Relay outputs – control multiple devices from one board
- Opto-isolated design (board-level) – helps provide safer switching for higher-voltage loads and minimize the feedback and interference
- Screw terminals – no more loose Dupont wires when controlling pumps, lights or other devices
- Onboard buttons & status LEDs – for quick manual testing
- OLED display – for quick status updates and debugging
What can you build with the Actuating Dev Kit?
 Smart home lighting – turn lights ON/OFF from your phone or a web dashboard.
 Automatic irrigation system – control water pumps based on soil moisture or time.
 Fan / exhaust control – keep rooms, grow tents or cabinets at the right conditions.
 Industrial prototypes – control motors, solenoids or valves.
Its robust layout makes this board suitable for both prototyping and integration into enclosures or control panels in production environments.
3. Built for Makers, Students and Startups
These boards were designed by engineers who build real systems, not just demos. Their focus on reliability and practical usability such as:
- Fewer wires → fewer mistakes
- Clean PCB layout → easier to mount in boxes and panels
- Common sensors and relays → thousands of code examples available
They are perfect if you are:
- A student doing a final year project with IoT
- A teacher running workshops or labs
- A maker building a smart home, smart farm or DIY automation
- A startup who wants to go beyond breadboards and move closer to production
And of course, they are ESP32-based, so you get Wi-Fi, Bluetooth and solid processing power in one chip.
4. Works with the Tools You Already Know
You don’t have to learn a new ecosystem. The boards are compatible with:
- Arduino IDE
- PlatformIO
- ESP-IDF
- MicroPython
And they play nicely with popular IoT platforms like:
- Firebase Realtime Database
- MQTT brokers (HiveMQ, Mosquitto, etc.)
- Node-RED dashboards
- Blynk, Home Assistant and many more
If you can blink an LED on an ESP32 or Arduino, you can start using these boards in minutes.
5. Example Project Flow: From Sensor to Relay
Here is a simple way to use both boards together:
- Sensing Dev Kit measures temperature, humidity and light.
- It sends the data to the cloud (Firebase / MQTT).
- A small rule (in Node-RED or your own Python script) decides what to do.
- Actuating Dev Kit receives a command and turns a pump, fan or light ON/OFF.
In a weekend, you could build a small but complete IoT automation system.
Later, you can add scheduling, mobile app control, data logging and alerts, all using the same hardware.
6.Getting Started (High-Level Steps)
- You can order the devkits online
- Learn from the ThingsInNet Blog examples
- Connect via USB
- Plug the board into your computer using a USB cable.
- Install drivers if required.
- Install ESP32 support in Arduino IDE
- Flash a basic example
- For Sensing: read sensor values and print them to the Serial Monitor / OLED.
- For Actuating: switch relays ON/OFF using the built-in buttons or simple code.
- Add Networking
- Connect to Wi-Fi, publish readings to MQTT or update Firebase values.
- Build your UI
- Use a web page, Node-RED dashboard, or mobile app to visualize and control.
Once you are comfortable, you can start combining both boards into bigger, smarter systems.
Final Thoughts
The ThingsInNet Sensing and Actuating Dev Kits are for anyone who is tired of just watching IoT tutorials and wants to actually build something real:
- Sense your world

- Control your devices

- Connect everything to the cloud/Internet

Whether you are a beginner with Arduino, a student learning ESP32, or a maker/startup working on your next product, these boards help you move faster from:
Idea → Prototype → Practical System.
Start building, experimenting and automating and let your projects go beyond the breadboard.